Source Database
Bemi tracks changes made in a primary PostgreSQL database (source database) by implementing a design pattern called Change Data Capture (CDC), a process of identifying and capturing changes made to data in a database in real-time. More specifically, Bemi workers connect and use built-in PostgreSQL replication mechanisms with Write-Ahead Log (WAL).
Connection
Specify the following source database connection details:
- Host
- Database
- Port
- User
- Password
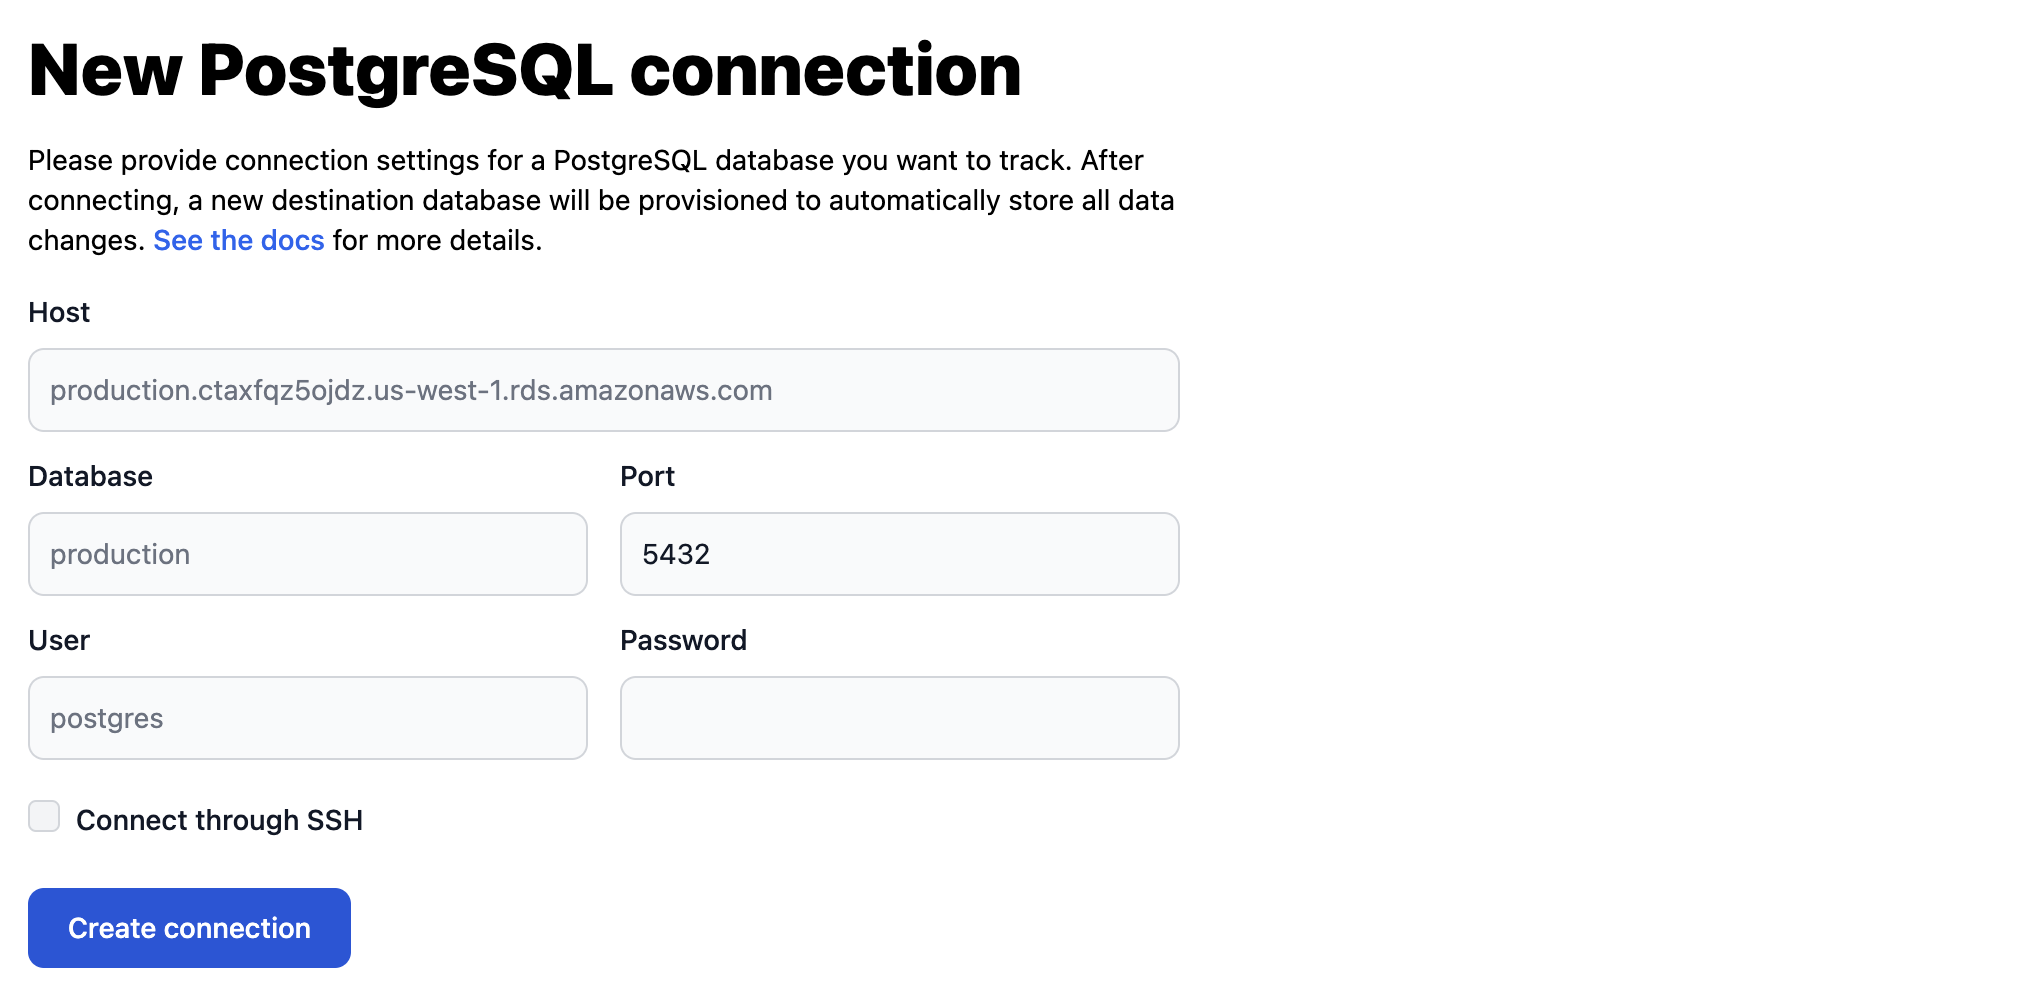
After that, you can enable selective tracking and pick which database tables you want to track.
WAL Level
Bemi relies on logical replication that allows ingesting changes row-by-row, unlike physical replication that sends disk block changes.
You can check the wal_level to make sure logical replication is enabled:
SHOW wal_level;
+-------------+
| wal_level   |
|-------------|
| logical     |
+-------------+
If your current WAL level is set to replica, you need to update it to logical and restart your PostgreSQL instance.
Updating this value won't break replication, it will just slightly increase the WAL volume (disk space and network traffic if there are replicas).
You can find more information in the following guides on how to change the WAL level and connect depending on your hosting platform:
Selective tracking
Tracking by Tables
During the Source Database connection setup or any time after, you can configure what tables you want to track:
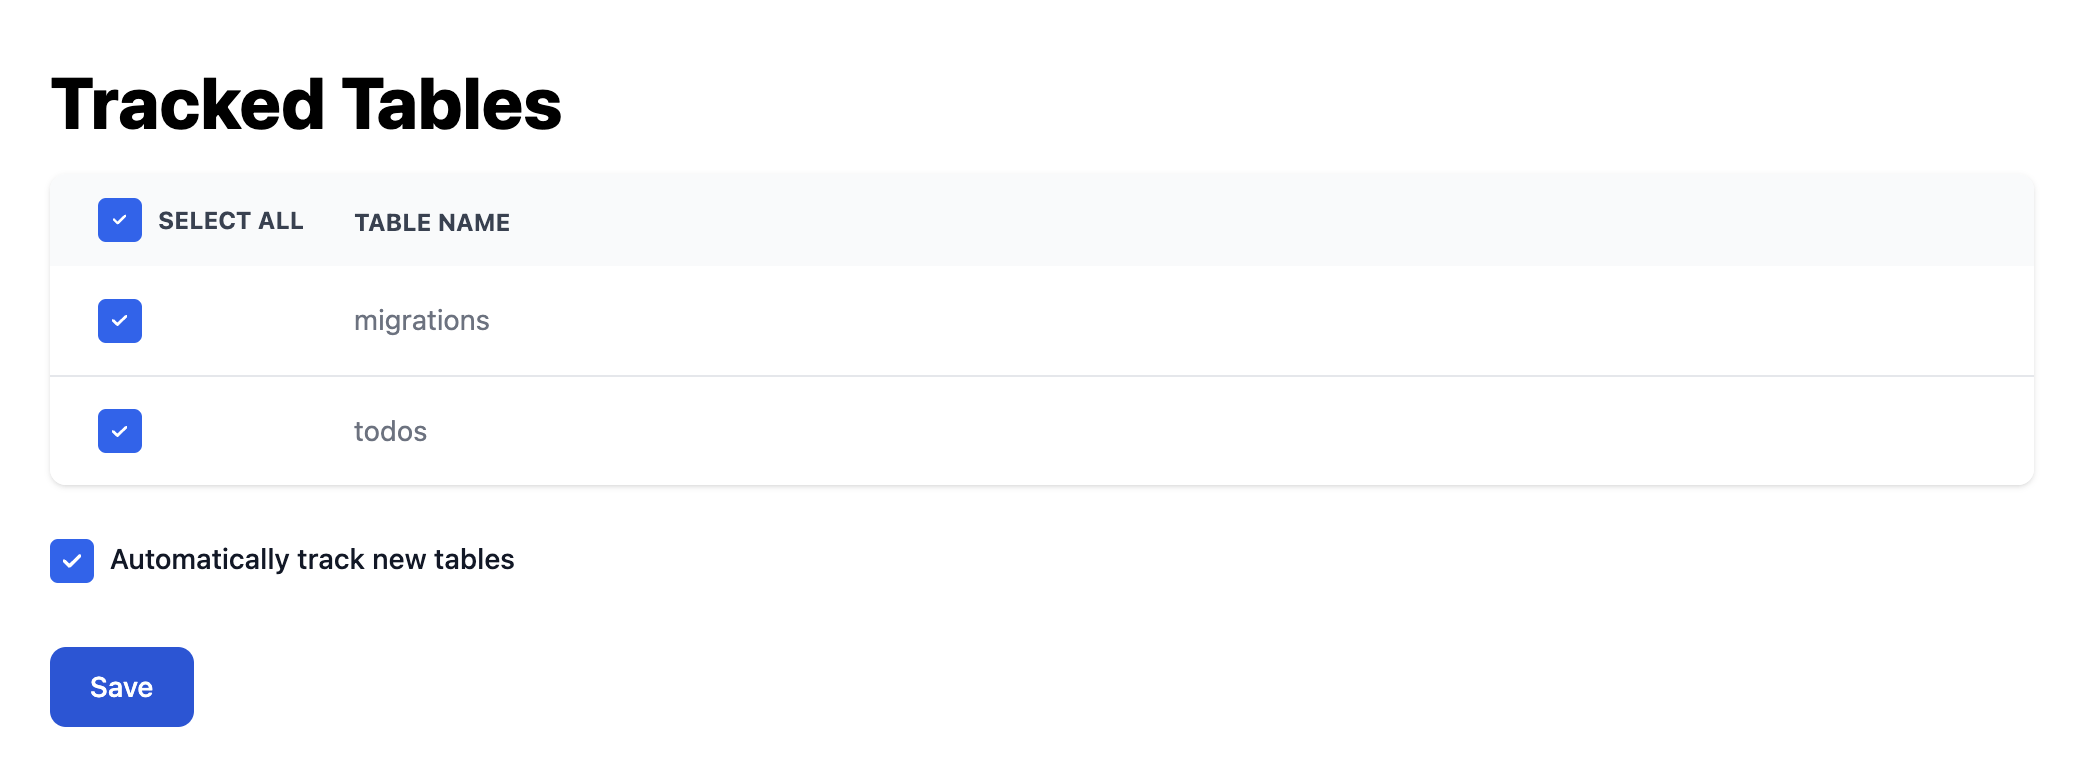
Bemi automatically tracks changes in the default public schema. If you would like to enable tracking for other schemas in your Bemi organization, please contact us.
Ignoring by Columns
Bemi allows to configure ignore-change columns, such as public.tableName.updatedAt, to ignore meaningless data changes.
This prevents the creation of a new audit trail entry (called "change") for a record in tableName if updatedAt was the only column value that was updated.
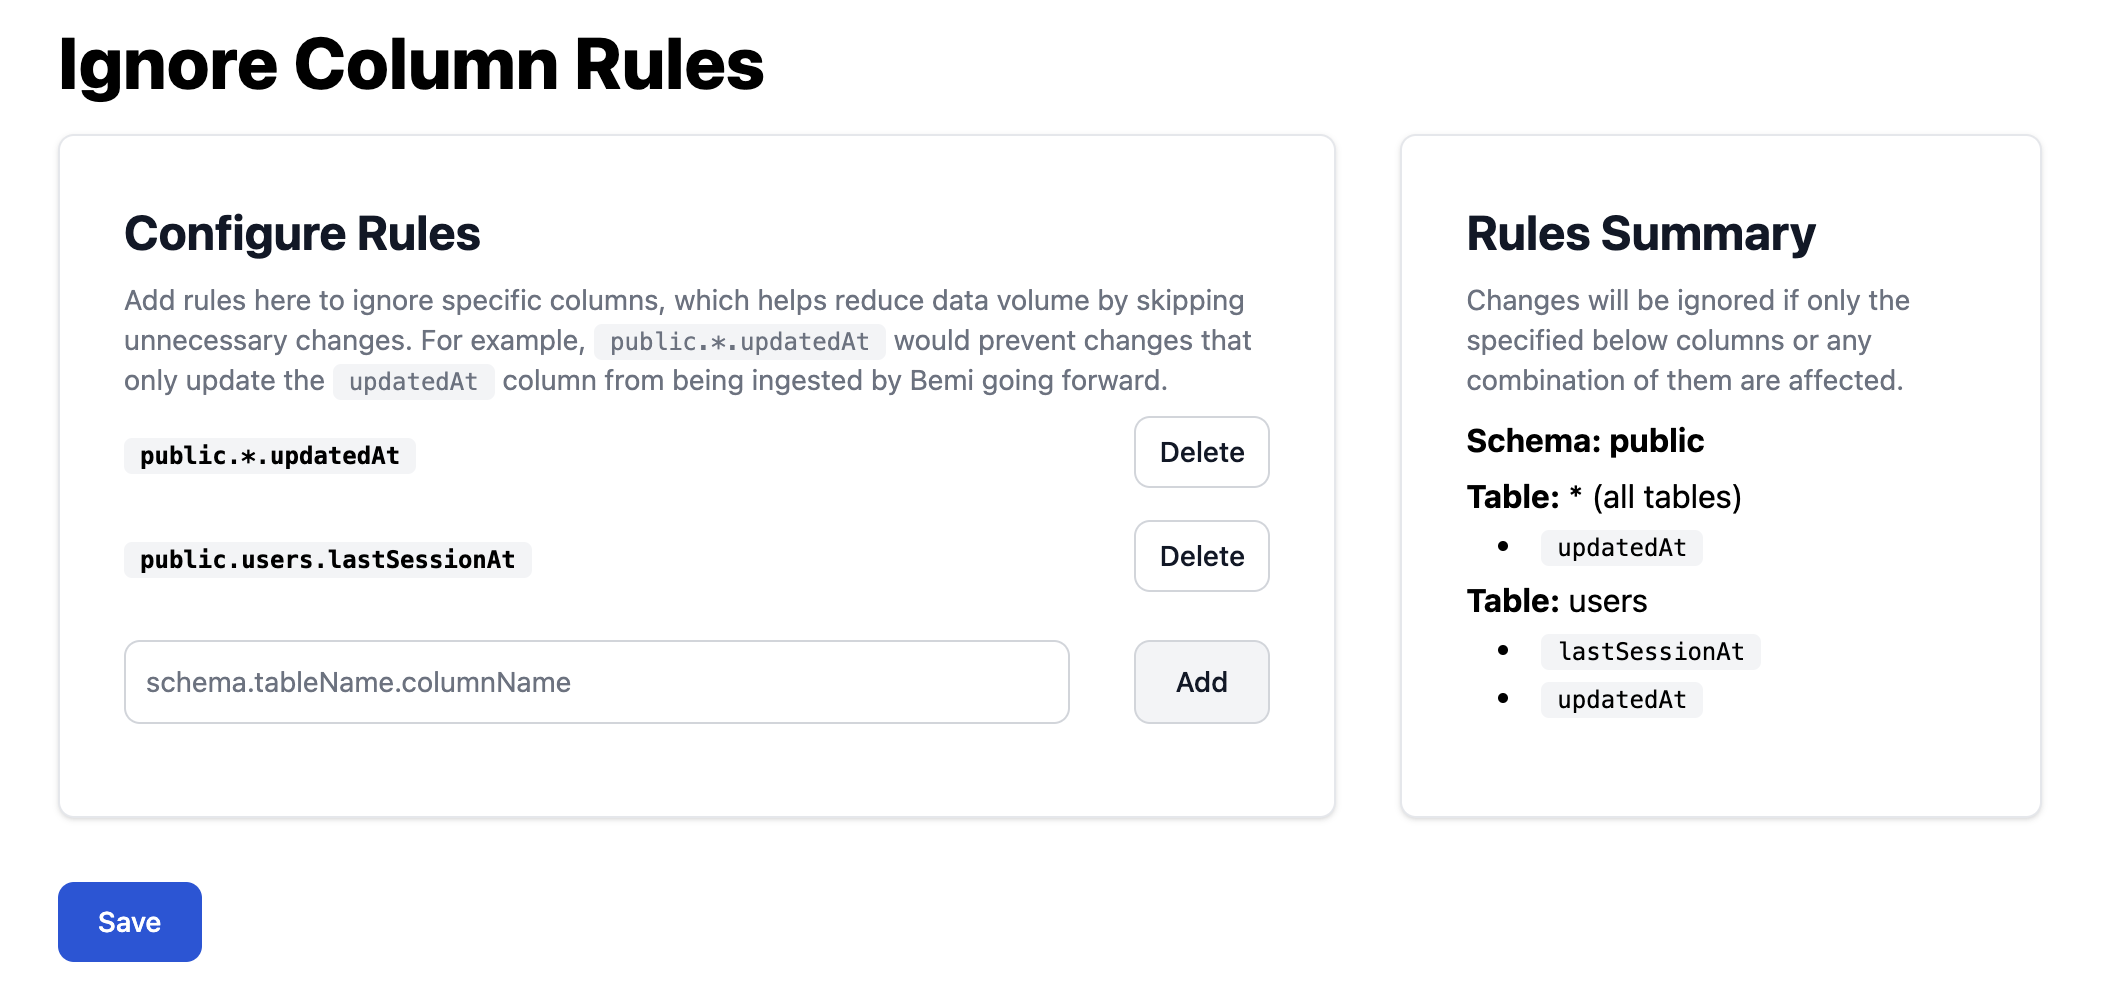
In other words, public.tableName.updatedAt is used to determine whether an audit trail entry should be recorded or not.
Note that this column will always be recorded if there were updated values in other columns.
SSH Tunnel

If your PostgreSQL source database is not accessible over the internet, you can specify SSH credentials to enable an SSH tunnel via your public jump host:
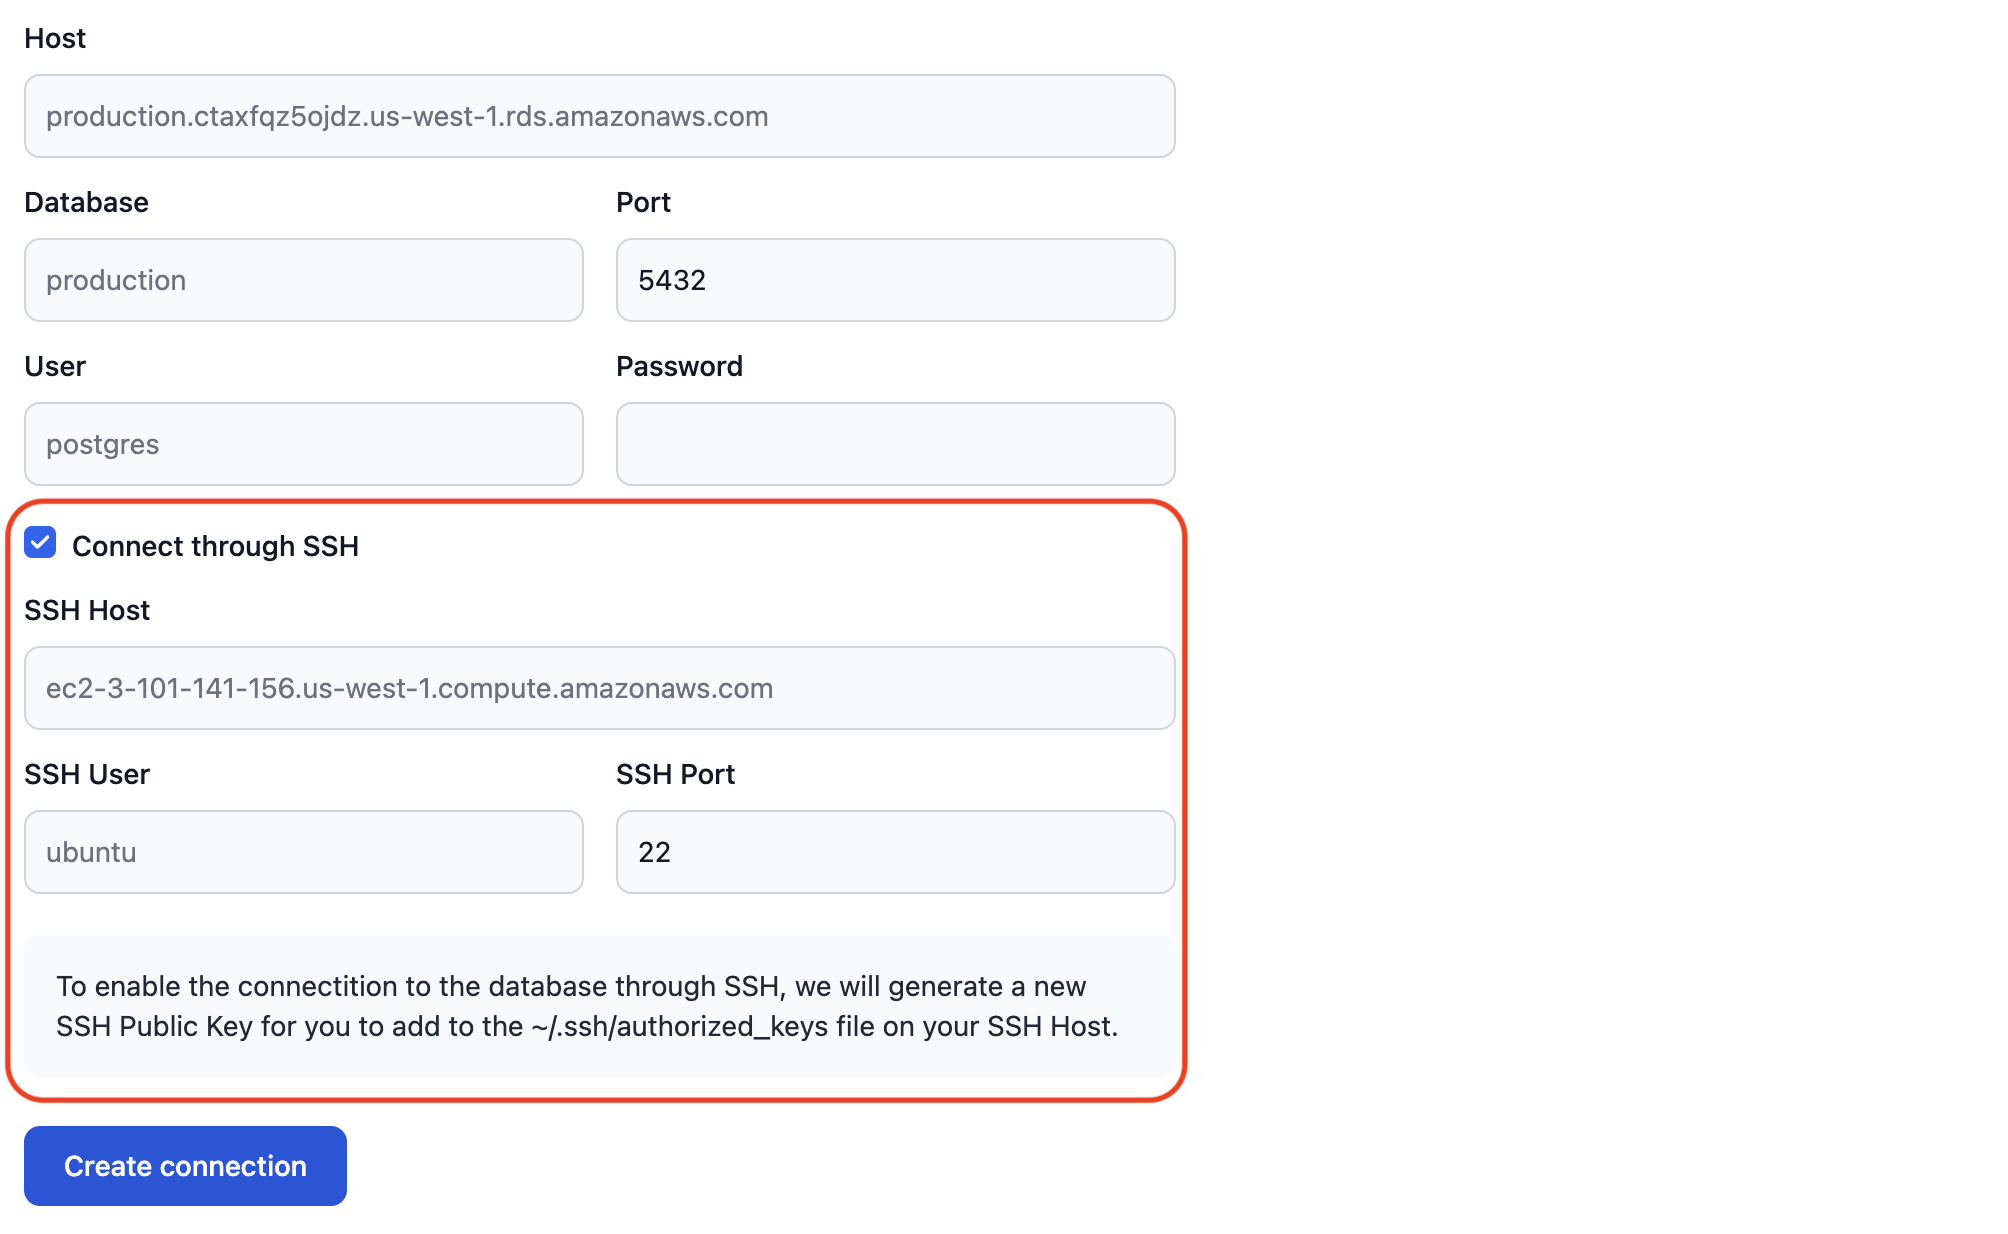
Once the source database connection settings are submitted, we'll generate a public SSH key:
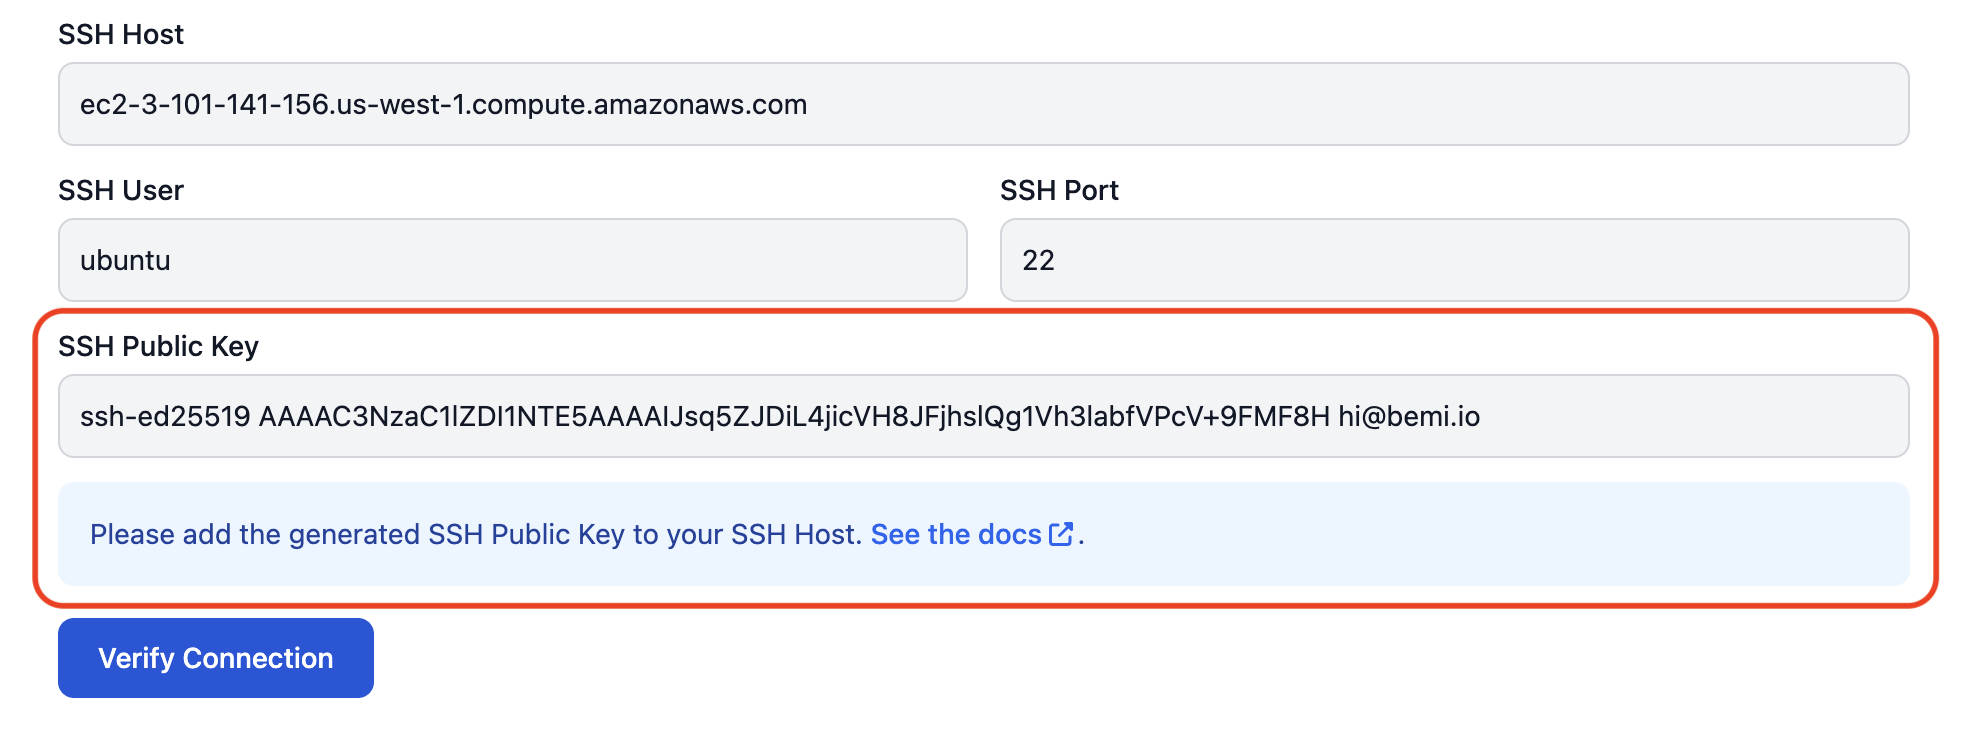
Add this public SSH key to your SSH host to allow Bemi workers to connect and SSH-tunnel to the PostgreSQL database:
touch ~/.ssh/authorized_keys && chmod 600 ~/.ssh/authorized_keys
echo 'ssh-ed25519 AAAAC3Nz...' >> ~/.ssh/authorized_keys
Note: if you need a public SSH Key before you know the SSH host address, just specify any address and later reach out to us to update it.
VPN Tunnel
If your PostgreSQL source database and SSH jump host can't be accessible over the internet, you can establish a secure VPN tunnel to our VPN server.

You need to provision a VPN node and configure VPN using WireGuard that combines strong encryption with fast speeds:
# Install WireGuard
sudo apt update && sudo apt install -y resolvconf wireguard

# Generate a private and public keys
wg genkey | tee wg-privatekey | wg pubkey > wg-publickey

# Get your network interface name (e.g., ens5)
NETWORK_INTERFACE=$(ip route get 8.8.8.8 | grep 8.8.8.8 | awk '{print $5}')

# Reach out to us to get the VPN server public key and endpoint
BEMI_PUBLIC_KEY=
BEMI_ENDPOINT=

# Send us your public key and PostgreSQL private IP address
cat wg-publickey
dig your-prod-postgres.abcdef5ghij.us-west-1.rds.amazonaws.com A +short | tail -n 1

# Enable IP forwarding
echo "net.ipv4.ip_forward = 1" | sudo tee -a /etc/sysctl.conf
sudo sysctl -p

# Create a WireGuard configuration file with the following content
cat << EOF > wg0.conf
[Interface]
PrivateKey = $(cat ./wg-privatekey)
Address = 10.0.0.1/24
PostUp = iptables -t nat -A POSTROUTING -o $NETWORK_INTERFACE -j MASQUERADE
PostDown = iptables -t nat -D POSTROUTING -o $NETWORK_INTERFACE -j MASQUERAD

[Peer]
PublicKey = $BEMI_PUBLIC_KEY
AllowedIPs = 10.0.0.2/32
Endpoint = $BEMI_ENDPOINT:51820
PersistentKeepalive = 25
EOF
sudo mv wg0.conf /etc/wireguard/wg0.conf

sudo systemctl enable [email protected]
sudo systemctl start [email protected]
systemctl status [email protected]
Once you have the WireGuard running, we'll be able to connect to your PostgreSQL database over the VPN tunnel.
Here is a Terraform snippet to run all the commands above on AWS:
locals {
  # For example, Ubuntu 24.04 LTS - arm64
  ami           = "ami-..."
  instance_type = "t4g.micro"

  # Your private subnet ID
  private_subnet_id = "subnet-..."

  # Bemi VPN server information
  bemi_public_key = "..."
  bemi_endpoint   = "..."

  # Optionally if you want to SSH to the VPN node
  ssh_key_name    = "..."
  ssh_cidr_blocks = [".../32"]
}

resource "aws_security_group" "bemi-vpn-node" {
  name        = "bemi-vpn-node"
  description = "Security group for bemi-vpn-node"

  ingress {
    description = "SSH"
    from_port   = 22
    to_port     = 22
    protocol    = "tcp"
    cidr_blocks = local.ssh_cidr_blocks
  }

  egress {
    from_port        = 0
    to_port          = 0
    protocol         = "-1"
    cidr_blocks      = ["0.0.0.0/0"]
    ipv6_cidr_blocks = ["::/0"]
  }

  tags = {
    Name = "bemi-vpn-node"
  }
}

resource "aws_instance" "bemi-vpn-node" {
  ami                         = local.ami
  instance_type               = local.instance_type
  key_name                    = local.ssh_key_name
  associate_public_ip_address = false
  subnet_id                   = local.private_subnet_id
  security_groups             = [aws_security_group.bemi-vpn-node.id]

  tags = {
    Name = "bemi-vpn-node"
  }

  user_data = <<-EOF
#!/bin/bash

sudo apt update
sudo apt install -y resolvconf wireguard

cd /home/ubuntu
wg genkey | tee wg-privatekey | wg pubkey > wg-publickey

echo "net.ipv4.ip_forward = 1" | sudo tee -a /etc/sysctl.conf
sudo sysctl -p

cat << EOF_WG_CONF > wg0.conf
[Interface]
PrivateKey = $(cat ./wg-privatekey)
Address = 10.0.0.1/24
PostUp = iptables -t nat -A POSTROUTING -o ens5 -j MASQUERADE
PostDown = iptables -t nat -D POSTROUTING -o ens5 -j MASQUERAD

[Peer]
PublicKey = ${local.bemi_public_key}
AllowedIPs = 10.0.0.2/32
Endpoint = ${local.bemi_endpoint}:51820
PersistentKeepalive = 25
EOF_WG_CONF
sudo mv wg0.conf /etc/wireguard/wg0.conf

sudo systemctl enable [email protected]
sudo systemctl start [email protected]
  EOF
}
To check the WireGuard status, SSH to the VPN node and run:
# Check the WireGuard status
systemctl status [email protected]
sudo wg show

# Check the WireGuard configuration file
sudo cat /etc/wireguard/wg0.conf

# Check your public WireGuard key and share it with us
cat ./wg-publickey
Bemi Static IPs
If you restrict access to your databases by IP addresses, contact us. We will share our static IP addresses, which you can add to an allowlist, so we can connect to your Source PostgreSQL database.
Disconnecting
To disconnect from Bemi, you can to execute the following queries to remove the triggers that set REPLICA IDENTITY FULL for tracking the previous state:
DROP EVENT TRIGGER _bemi_set_replica_identity_trigger;
DROP FUNCTION _bemi_set_replica_identity_func;
DROP PROCEDURE _bemi_set_replica_identity;
If you used Bemi packages for the Supported ORMs, you can execute the following queries to remove the lightweight triggers used for passing application context:
DROP EVENT TRIGGER _bemi_create_table_trigger;
DROP FUNCTION _bemi_create_table_trigger_func;
DROP PROCEDURE _bemi_create_triggers;
DROP FUNCTION _bemi_row_trigger_func CASCADE;
To completely disable logical replication, run the following queries:
(!!!) If you later decide to resume Bemi, we won't be able to recover and ingest data changes after this point.
SELECT pg_drop_replication_slot('bemi');
DROP PUBLICATION bemi;