Drizzle
BemiHQ/bemi-io-drizzleBemi plugs into Drizzle and PostgreSQL to track database changes automatically. It unlocks robust context-aware audit trails and time travel querying inside your application.
This package is a recommended Drizzle integration, enabling you to pass application-specific context when performing database changes. This can include context such as the 'where' (API endpoint, worker, etc.), 'who' (user, cron job, etc.), and 'how' behind a change, thereby enriching the information captured by Bemi.
See this example repo as an Todo app example with Drizzle that automatically tracks and contextualizes all changes.
Prerequisites
- PostgreSQL 14+
- Drizzle
Installation
- Install the NPM package
npm install @bemi-io/drizzle
- Generate a Drizzle migration file and populate it to add lightweight PostgreSQL triggers for passing application context with all data changes into PostgreSQL replication log
npx drizzle-kit generate --custom --name=bemi
[✓] Your SQL migration file ➜ drizzle/0001_bemi.sql 🚀

npx bemi migration:generate --path drizzle/0001_bemi.sql
- Run pending Drizzle migrations
npx drizzle-kit migrate
Usage
Wrap your Drizzle instance by using withBemi:
import { withBemi } from "@bemi-io/drizzle";
import { drizzle } from 'drizzle-orm/node-postgres';

const db = withBemi(drizzle(process.env.DATABASE_URL!));
Now you can specify custom application context that will be automatically passed with all data changes by following the code examples below.
Application context:
- Is bound to the current asynchronous runtime execution context, for example, an HTTP request.
- Is used only with
INSERT,UPDATE,DELETESQL queries performed via Drizzle. Otherwise, it is a no-op. - Is passed directly into PG Write-Ahead Log with data changes without affecting the structure of the database and SQL queries.
Express.js
Add the bemiExpressMiddleware Express middleware to pass application context with all underlying data changes within an HTTP request:
import { bemiExpressMiddleware } from "@bemi-io/drizzle";
import express, { Request } from "express";

const app = express();

// This is where you set any information that should be stored as context with all data changes
app.use(
  bemiExpressMiddleware((req: Request) => ({
    endpoint: req.url,
    params: req.body,
    userId: req.user?.id,
  }))
);
Inline context
It is also possible to manually set or override context by using the bemiContext function:
import { setBemiContext } from "@bemi-io/drizzle";

export const handler = async (event) => {
  setBemiContext({
    gqlField: `${event.typeName}.${event.fieldName}`,
    gqlArguments: event.arguments,
    origin: event.request.headers.origin,
  })

  // Your db operations here
}
tRPC
You can also use the bemiTRPCMiddleware to automatically pass application context within tRPC procedures:
import { bemiTRPCMiddleware } from "@bemi-io/drizzle";
import { initTRPC } from '@trpc/server';

const t = initTRPC.context<MyContext>().create();

// Create a Bemi middleware for tRPC to set the Bemi context
const bemiMiddleware = bemiTRPCMiddleware(({ ctx }) => ({
  userId: ctx.session?.user?.id,
}));

// Use the Bemi middleware in your tRPC procedures
export const publicProcedure = t.procedure.use(bemiMiddleware);
Data change tracking
Local database
To test data change tracking and the Drizzle integration with a locally connected PostgreSQL, you need to set up your local PostgreSQL.
First, make sure your database has SHOW wal_level; returning logical. Otherwise, you need to run the following SQL command:
-- Don't forget to restart your PostgreSQL server after running this command
ALTER SYSTEM SET wal_level = logical;
To track both the "before" and "after" states on data changes, please run the following SQL command:
ALTER TABLE [YOUR_TABLE_NAME] REPLICA IDENTITY FULL;
Then, run a Docker container that connects to your local PostgreSQL database and starts tracking all data changes:
docker run \
  -e DB_HOST=host.docker.internal \
  -e DB_PORT=5432 \
  -e DB_NAME=[YOUR_DATABASE] \
  -e DB_USER=postgres \
  -e DB_PASSWORD=postgres \
  public.ecr.aws/bemi/dev:latest
Replace DB_NAME with your local database name. Note that DB_HOST pointing to host.docker.internal allows accessing 127.0.0.1 on your host machine if you run PostgreSQL outside Docker. Customize DB_USER and DB_PASSWORD with your PostgreSQL credentials if needed.
Now try making some database changes. This will add a new record in the changes table within the same local database after a few seconds:
psql postgres://postgres:[email protected]:5432/[YOUR_DATABASE] -c \
  'SELECT "primary_key", "table", "operation", "before", "after", "context", "committed_at" FROM changes;'

 primary_key | table | operation |                       before                       |                       after                         |                        context                                                            |      committed_at
-------------+-------+-----------+----------------------------------------------------+-----------------------------------------------------+-------------------------------------------------------------------------------------------+------------------------
 26          | todo  | CREATE    | {}                                                 | {"id": 26, "task": "Sleep", "is_completed": false}  | {"user_id": 187234, "endpoint": "/todo", "method": "POST", "SQL": "INSERT INTO ..."}      | 2023-12-11 17:09:09+00
 27          | todo  | CREATE    | {}                                                 | {"id": 27, "task": "Eat", "is_completed": false}    | {"user_id": 187234, "endpoint": "/todo", "method": "POST", "SQL": "INSERT INTO ..."}      | 2023-12-11 17:09:11+00
 28          | todo  | CREATE    | {}                                                 | {"id": 28, "task": "Repeat", "is_completed": false} | {"user_id": 187234, "endpoint": "/todo", "method": "POST", "SQL": "INSERT INTO ..."}      | 2023-12-11 17:09:13+00
 26          | todo  | UPDATE    | {"id": 26, "task": "Sleep", "is_completed": false} | {"id": 26, "task": "Sleep", "is_completed": true}   | {"user_id": 187234, "endpoint": "/todo/complete", "method": "PUT", "SQL": "UPDATE ..."}   | 2023-12-11 17:09:15+00
 27          | todo  | DELETE    | {"id": 27, "task": "Eat", "is_completed": false}   | {}                                                  | {"user_id": 187234, "endpoint": "/todo/27", "method": "DELETE", "SQL": "DELETE FROM ..."} | 2023-12-11 17:09:18+00
Remote database
Go to Bemi.io Dashboard UI and follow the instructions to connect your hosted PostgreSQL database in a few seconds.
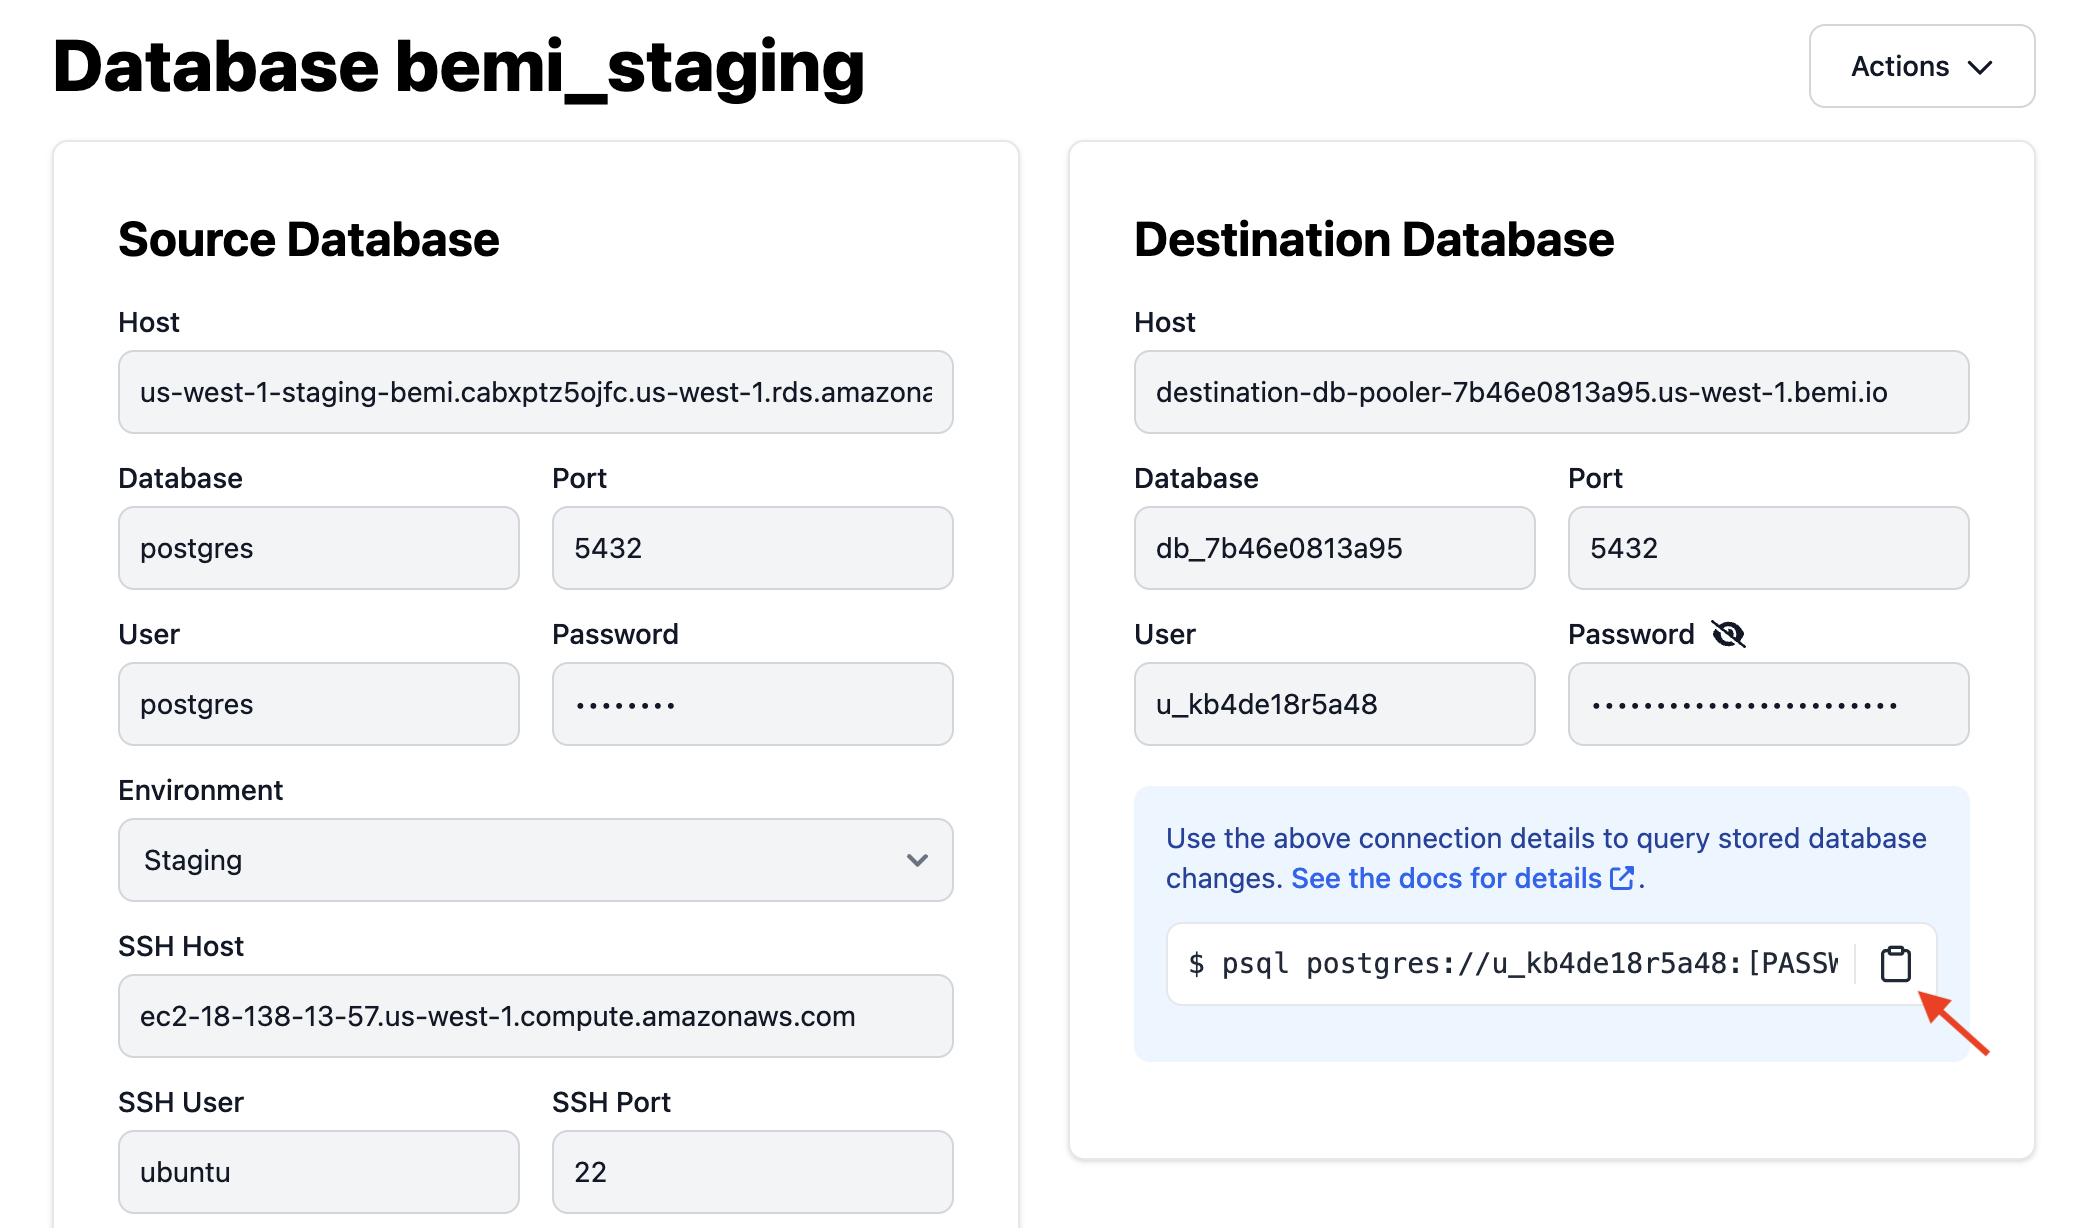
Once the project infrastructure is provisioned, it'll automatically ingest and store all data changes stitched with an application context in a separate serverless PostgreSQL database. You can test the connection by running the following command:
psql postgres://[USERNAME]@[HOSTNAME]:5432/[DATABASE] -c \
  'SELECT "primary_key", "table", "operation", "before", "after", "context", "committed_at" FROM changes;'

 primary_key | table | operation |                       before                       |                       after                         |                        context                                                            |      committed_at
-------------+-------+-----------+----------------------------------------------------+-----------------------------------------------------+-------------------------------------------------------------------------------------------+------------------------
 26          | todo  | CREATE    | {}                                                 | {"id": 26, "task": "Sleep", "is_completed": false}  | {"user_id": 187234, "endpoint": "/todo", "method": "POST", "SQL": "INSERT INTO ..."}      | 2023-12-11 17:09:09+00
 27          | todo  | CREATE    | {}                                                 | {"id": 27, "task": "Eat", "is_completed": false}    | {"user_id": 187234, "endpoint": "/todo", "method": "POST", "SQL": "INSERT INTO ..."}      | 2023-12-11 17:09:11+00
 28          | todo  | CREATE    | {}                                                 | {"id": 28, "task": "Repeat", "is_completed": false} | {"user_id": 187234, "endpoint": "/todo", "method": "POST", "SQL": "INSERT INTO ..."}      | 2023-12-11 17:09:13+00
 26          | todo  | UPDATE    | {"id": 26, "task": "Sleep", "is_completed": false} | {"id": 26, "task": "Sleep", "is_completed": true}   | {"user_id": 187234, "endpoint": "/todo/complete", "method": "PUT", "SQL": "UPDATE ..."}   | 2023-12-11 17:09:15+00
 27          | todo  | DELETE    | {"id": 27, "task": "Eat", "is_completed": false}   | {}                                                  | {"user_id": 187234, "endpoint": "/todo/27", "method": "DELETE", "SQL": "DELETE FROM ..."} | 2023-12-11 17:09:18+00
See Destination Database for more details.
License
Distributed under the terms of the LGPL-3.0. If you need to modify and distribute the code, please release it to contribute back to the open-source community.